The Complete Guide to Bikepacking for Beginners and Weekend Adventurers
So, you’ve seen those photos. A bike leaning against a lone pine, dusty bags strapped to its frame, a camp stove simmering as the sun dips low. That’s bikepacking. And honestly, it’s less about epic, months-long continental crossings and more about turning your weekend into a proper adventure. It’s cycling, camping, and exploring, all rolled into one beautifully simple package.
Here’s the deal: you don’t need a fancy bike or to be an ultra-athlete. You just need a willingness to move a bit slower, to see the world from two wheels, and to sleep under the stars. This guide is your first step. Let’s dive in.
What is Bikepacking, Really? (And How It’s Different)
Think of it as backpacking’s cooler, more streamlined cousin. Instead of a giant pack on your back, you distribute your gear in specialized bags that attach directly to your bike’s frame, handlebar, and seatpost. That means the bike carries the weight, not your spine. The result? You feel more connected to the bike, the trail, and the ride itself.
It’s often confused with traditional bicycle touring, which usually involves paved roads, panniers (those big saddlebags), and maybe more creature comforts. Bikepacking tends to lean towards mixed-terrain routes—gravel paths, forest tracks, a bit of singletrack. It’s inherently more agile. The spirit is about minimalism and getting onto those quieter, wilder paths.
Gear Up Without Going Broke: The Starter Kit
The gear rabbit hole can go deep. But for your first few overnight bikepacking trips, you can keep it remarkably simple. The core philosophy? Use what you have, borrow what you can, and only buy the essentials.
The Bike: It’s Probably the One You Already Own
Seriously. A mountain bike, a gravel bike, even a sturdy hybrid with decent tire clearance can be your steed. The key is reliability, not price tag. Ensure it’s mechanically sound—get a tune-up if needed—and that it fits you. Comfort is king when you’re spending hours in the saddle.
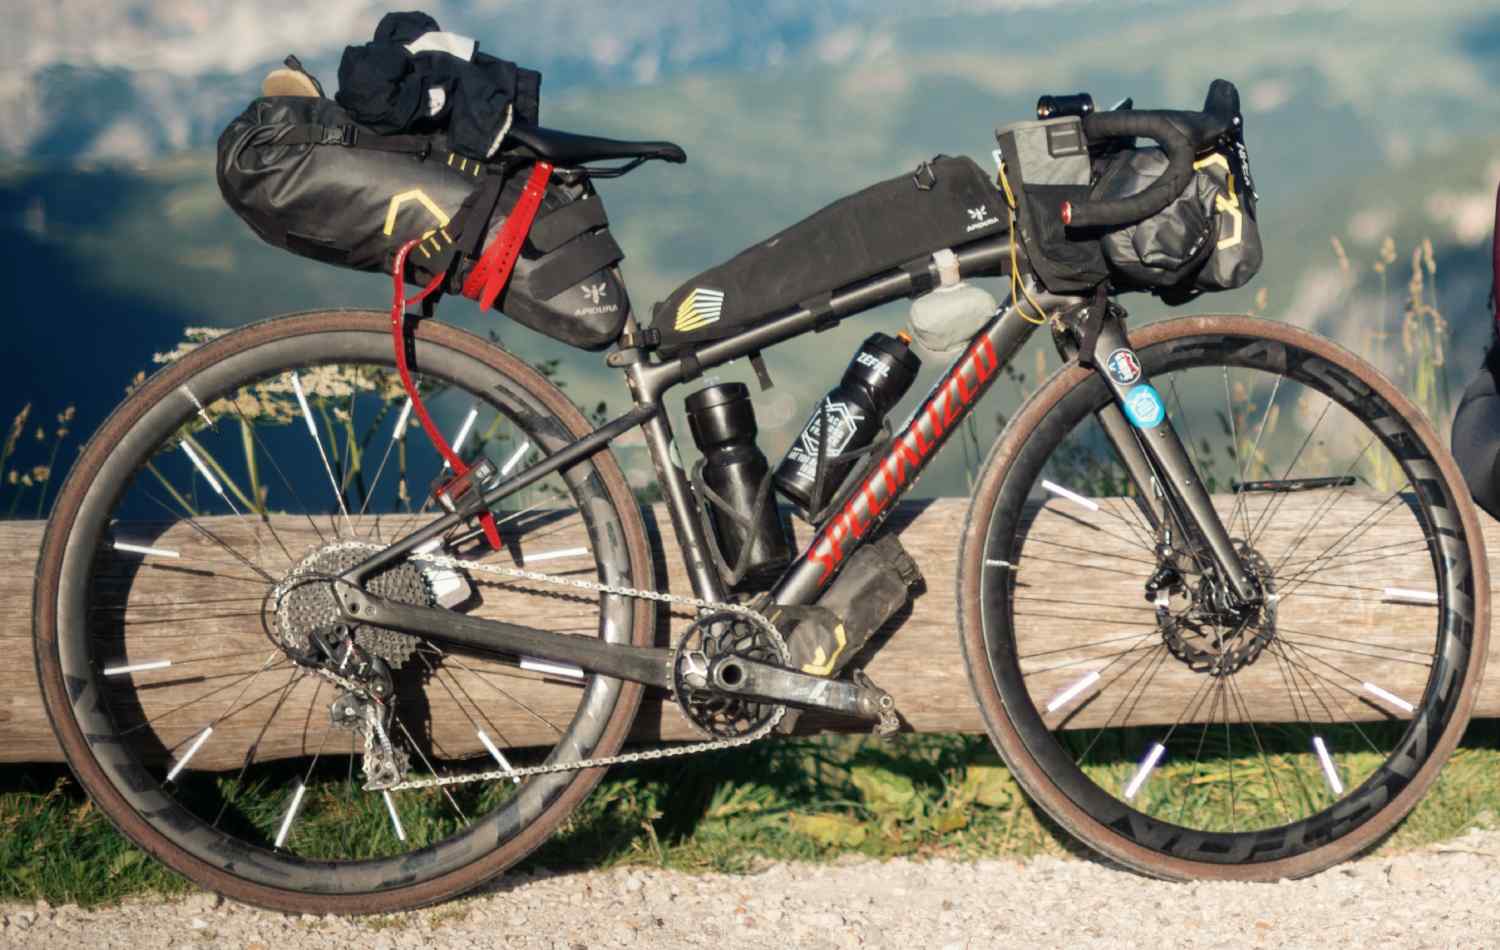
Bikepacking Bags: The Core System
This is your main investment. A good starter set includes three bags:
- Handlebar Roll: Carries your bulky, light stuff—sleeping bag, insulated jacket, tent if it packs small.
- Frame Bag: Fits in your bike’s main triangle. Perfect for heavier items like tools, a water bladder, and food to keep weight centered.
- Seat Pack: Attaches under your saddle. Great for your sleep system or clothing.
You can start with just one or two. I’ve seen folks do a weekend with a handlebar roll and a backpack, though I’d advise against a heavy backpack—it gets old fast.
Camping & Shelter: Keep It Light, Keep It Simple
You’re not base-camping. You’re riding, then sleeping. Prioritize compact and lightweight options. A small tent, a bivy sack, or even a hammock if you’re in the right terrain. A sleeping bag and a pad are non-negotiables for comfort. Test your setup in the backyard first. Trust me on this.
Planning Your First Overnight Bikepacking Trip
Ambition is great, but for trip number one, embrace the “shakedown” mentality. The goal is to learn, not to suffer.
- Distance: Aim silly low. 20-30 miles total, over two days. You’ll be slower than you think with a loaded bike.
- Route: Look for rail-trails, quiet forest service roads, or designated bikepacking routes. Apps like Komoot or Ride with GPS are invaluable. Tell someone your plan.
- Camping: Know the rules. Is it public land with dispersed camping? A designated campground? Figure this out before you’re tired at dusk.
- Water & Food: Map your water sources. Carry a filter. For food, think calorie-dense and no-cook or easy-cook: tortillas, nut butter, cheese, sausages, instant oatmeal. A hot meal at camp is a huge morale booster.
Packing Like a Pro: The Art of Loading Your Bike
How you pack affects how your bike handles—dramatically. It’s a bit like loading a canoe. You want it balanced.
| Weight Placement | What to Put There | Why It Matters |
| Low & Center (Frame Bag) | Tools, water, food, heavy electronics | Keeps the bike stable and steering predictable. This is your prime real estate. |
| Front (Handlebar Roll) | Light, bulky insulation & sleep system | Adds a bit of steering weight but keeps the front end from feeling twitchy. |
| Rear (Seat Pack) | Medium-weight items like clothing, shelter | Too much weight here makes the bike feel sluggish and the rear wheel “wander.” |
Do a test ride around the block. Does the bike feel squirrely? Is something rattling? Adjust. This is the most important pre-trip step you can take.
On the Trail: Mindset & Practical Tips
You’re packed. You’re ready. Now, shift your head into adventure mode.
- Embrace the Slow: Your average speed will drop. That’s not a failure—it’s a feature. You notice more.
- Snack Constantly: Eat before you’re hungry, drink before you’re thirsty. Little and often keeps the energy steady.
- Mechanicals Happen: Know how to fix a flat. Carry a basic multi-tool, a tube, tire levers, and a patch kit. That’s your absolute minimum.
- Leave No Trace: This is sacred. Pack out everything. Be invisible.
Honestly, The Biggest Barrier is Just Starting
We get hung up on gear, on fitness, on not knowing enough. But bikepacking, at its heart, is just riding a bike and sleeping outside. It’s that simple. Your first trip will be messy. You’ll forget the spoon. You’ll pack too many socks. You’ll probably take a wrong turn.
And that’s the whole point. Those slight misadventures become the stories. They’re what transform a simple overnight into a genuine expedition. The feeling of self-reliance you get from pedaling your entire world to a quiet spot under a wide-open sky… well, it’s addictive.
So look at your calendar. Find a free weekend. Plot a short loop on a map you’ve never fully explored. Load up your bike, however clumsily. And just go. The trail, the quiet, the campfire satisfaction—it’s all waiting, just past the edge of town.